Secret Project Glow Cloud (Electronics)

Glow Selfie
Four months later (and about three and a half months after the mass-produced T-shirt arrived), I wore my shirt for the first time. Here’s how I made it.
Design and Vision
The Glow Cloud is a character that first appears in the second episode of Welcome to Night Vale. Canonically, it’s a glowing cloud that shifts color in an unspecified way and rains dead animals of varying sizes; it has other attributes which I encourage the unfamiliar reader to discover by listening to Welcome to Night Vale, and won’t spoil here because they’re not relevant to the shirt project. Since Welcome to Night Vale is an audio podcast, there isn’t a canonical visual representation of the cloud, but Welcome to Night Vale has a very robust fan art community from which I drew some inspiration; for other depictions, check out what Tumblr has to say on the issue.
I knew I wanted a recognizable cloud design, lit from behind by a LEDs which would suffuse the entire cloud with light. I also knew I wanted some kind of possibility for interaction with the Glow Cloud, and I toyed with a few ideas before deciding that I would use a light sensor to make the brightness of the LEDs correspond to the ambient light. I went through a few iterations before I landed on a simple hand-drawn cloud in the foreground, with the Welcome to Night Vale logo in the background hiding the light sensor.
I dithered a lot on the correct action of the LEDs lighting the cloud. It’s completely unclear in the source material whether the Glow Cloud glows only one color which is constantly changing, has regions which glow different colors, or does something else which is not obvious to mere human imagination. It’s also not clear whether the colors have a pattern, whether the cloud ever brightens or dims (or shows only colors not visible to human eyes), so I had a lot of freedom to just pick the action that I thought looked the neatest. In the end, I chose to have each LED run an independent randomization cycle, avoiding all-bright (white) and all-dark (black).
Components
Most of the Glow Cloud’s electronic components came from Adafruit by way of Sector67, our local Adafruit distributor and hackspace in Madison, Wisconsin. The LEDs behind the cloud are NeoPixel independently addressable wearable LEDs, the light sensor is the TSL2561 wearable lux sensor, and the controller is the FLORA, Adafruit’s wearable Arduino microcontroller. The circuit is worked in 3-ply conductive thread, with the exception of the data lines, which are worked in some thin conductive thread I was gifted. I had intended to use a 1000 mAh lithium-ion battery to power the project, but the power needs were too intense and I ended up using the Goal Zero Guide 10 rechargeable battery pack instead.
The backing for the final project was a natural canvas. The cloud element is a piece of linen with embroidery floss edging. The cloud is filled with leftover batting from a project of my mom’s. The Welcome to Night Vale logo is worked in embroidery floss on linen. Layers were joined together with embroidery floss. The final home of the assembled design is a simple purple cotton shirt, provenance forgotten.
The final design used 18 NeoPixels ($31.46), one FLORA ($24.95), one TSL2561 ($7.95), and most of a 60-foot spool of 3-ply conductive thread (let’s call it $5.00 worth). The canvas backing material is $6/yard at my local fabric store, and the final project used about 1/4 of a yard ($1.50). Most of the embroidery floss and linen used in the project was gifted to me, and I reused a battery pack that I already owned. The total out-of-pocket cost was $70.86, but it would’ve been more if not for the generosity of those around me and my access to multimeters and other tools at Sector67.
Assemble/Insert
Despite this being my first electronics project, I didn’t fall off the turnip truck yesterday, and the first thing I did was test all of the components individually to make sure they worked. I connected the FLORA to a computer and ran it through some simple “light an onboard LED” code, then loaded it with the example code provided in the Adafruit NeoPixel library which I could use to make sure the LEDs weren’t faulty. I connected each LED to ground, power, and a data pin and made sure it lit up red, green, and blue as expected before I sewed it into anything. (Careful readers will notice that I missed something here. Don’t worry, I’ll be punished for that later.) I also hooked the clips up and ran the TSL2561 through some sample code which provided light readings over serial, and confirmed that the input reads seemed basically sane. I didn’t find anything broken, to my extreme delight!

Revision #1, step 1

First test illumination in the circuit

All seven LEDs powered up
At this point, I touched some code for the first time in this project. In order to get a nice indication of the light readings from the sensor without having to read the serial port, I hacked the sample light sensor code and the sample NeoPixel code together, and wrote a loop that would change the brightness of the LED strip in accordance with the light sensor readings.
Light sensor controls brightness
For as simple and stupid as it was, I found it surprisingly fun to play with. Bright lights are neat, and making lights do stuff is super fun! After some fun playing with this, I sewed the power, ground, clock, and data connections for the light sensor, wrote the more-or-less final version of the code, and was ready to call it done… except for a few minor problems.
First, I didn’t have a nice way to power the circuit. I had been doing all of my testing by powering it over USB, but that’s not too portable. I ordered a couple of lithium-polymer batteries from Sparkfun to address this, which would fit into the JST plug on the FLORA. In the couple of weeks it took for them to arrive, I had plenty of time to think about my other and more severe problem – the stability problems when the fabric was deformed in any way (or even just breathed on). I pulled and re-sewed a few lines and managed to stabilize it slightly, but I was still unsatisfied. And there was another problem - it just wasn’t big enough or glowy enough to do the Glow Cloud justice. When I looked at it, I didn’t think “ALL HAIL THE GLOW CLOUD”, I thought “Those are some nice twinkling lights! Aw.”
Then my Officially Licensed Glow Cloud T-shirt came in the mail, and I thought “okay, screw this, I gotta up my game.” I ripped the controller, sensor, and LEDs off of the canvas and began stitching on Glow Cloud Mark II.

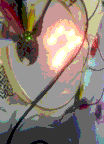
Glow Cloud Mark II up and running

These LEDs are all supposed to be lit with the same color and brightness. Well, shit.
Mark III had to be the last iteration of the project. I had done most of the work on Mark II while recovering from surgery in November, and decided to redo the project in late December, just before Christmas. I wanted to wear the finished project to the Welcome to Night Vale live show on January 16th, and so I didn’t have time for any more mistakes or rework. After conferring with some folks at Sector67 with electronics experience, I decided to disregard the Adafruit circuit layout advice and take a different tack with the Mark III.

Outermost LEDs in place as guides, with power buses populated.
I did a lot of testing of these LEDs as I added them into the circuit. Connecting them in parallel allowed me to decide whether to add more LEDs after the most important, shape-defining elements were all attached. The ten LEDs which formed the outlines of the cloud had no problems pulling enough juice to light up the whole night sky.

All 35 LEDs in formation; I hoped to be able to use all of them, but the final design used only half.

Testing data-out on LEDs before repopulating them in the circuit.

Hot glue to the rescue!
For the thrilling conclusion, see the companion entry on the embroidery work.